Utilize Tables & Forms
Elevate AI agents with Portal One Tables & Forms. Use structured data for dynamic tasks, checklists, data management & workflow automation. Improve AI capabilities & maximize agent potential.
This feature empowers you to ensure data consistency, improve traceability of information, and enable data reuse across various agent tasks. Think of it like equipping your agents with dynamic spreadsheets (Tables) where each row (a Form) can act as a structured data record, a task checklist, or an instruction set.
This powerful feature allows you to maintain state, create instructional checklists for predictable agent behavior, and manage datasets that your agents can read from and write to.
Prerequisites:
- Understanding AI Agents (The Basics)
- Connecting Your First LLM Provider
- Portal One MCP Server configured (for agent-driven data modifications)
Understanding the Terminology: Tables and Forms
In Portal One, the term "Table" refers to a structured data store, similar to a spreadsheet. Each Table has a defined set of columns (or "fields") with specific data types.
A "Form" in this context refers to a single row within a Table. Each Form is an instance of the Table's structure, holding specific values for each defined field.
Creating and Managing Tables
Step 1 - Navigate to Agent Forms: Access the Table management interface by selecting an agent, then clicking on the "Forms" tab.
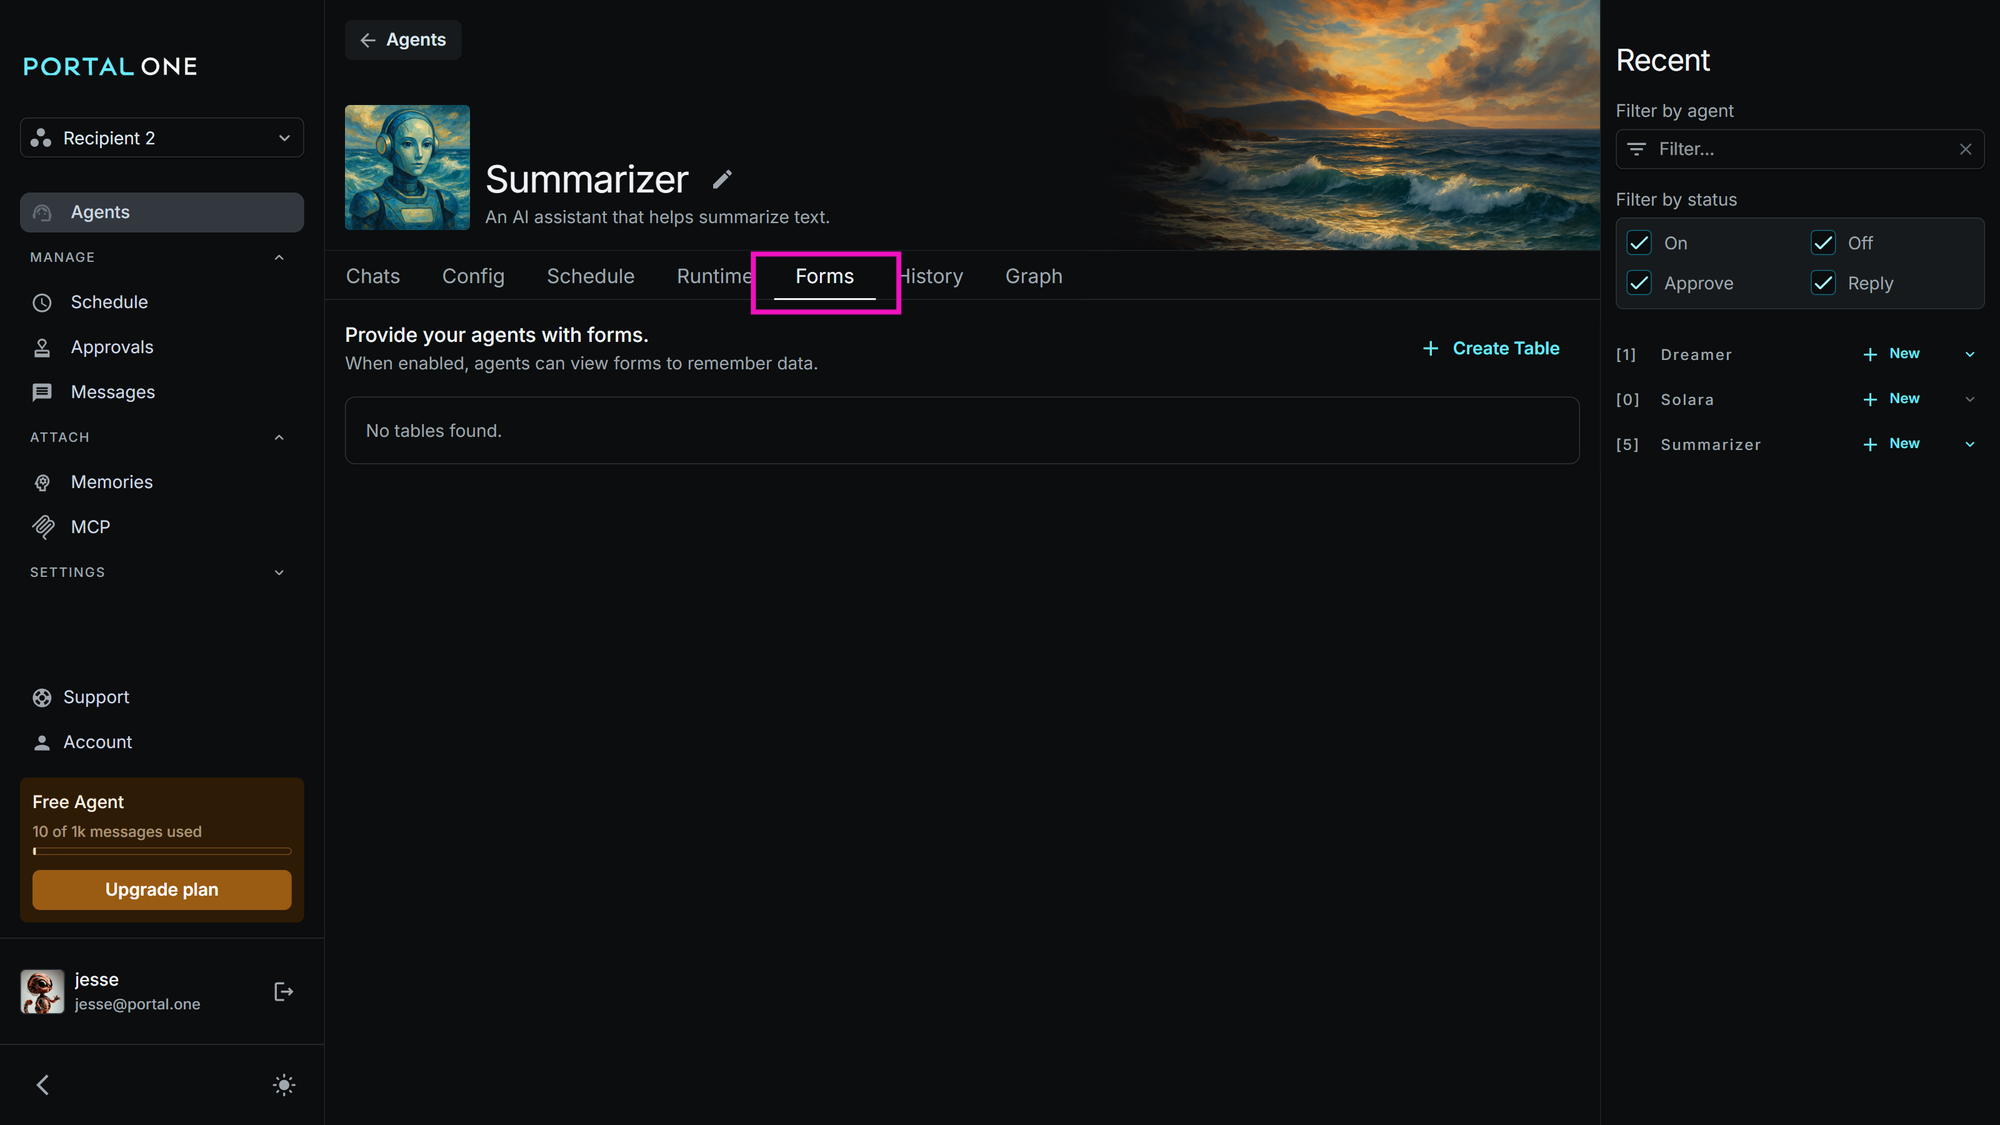
Step 2 - Create a New Table: Click the "+ Create Table" button. This will open a dialog where you define:
- Title: A descriptive name for your Table.
- Description: A brief explanation of the Table's purpose.
- Fields: Define each column for your Table. For each field, specify:
- Field name: The label for the column.
- Type: The data type (e.g., Text, Number, Date, Yes/No). You can add multiple fields and delete them as needed.
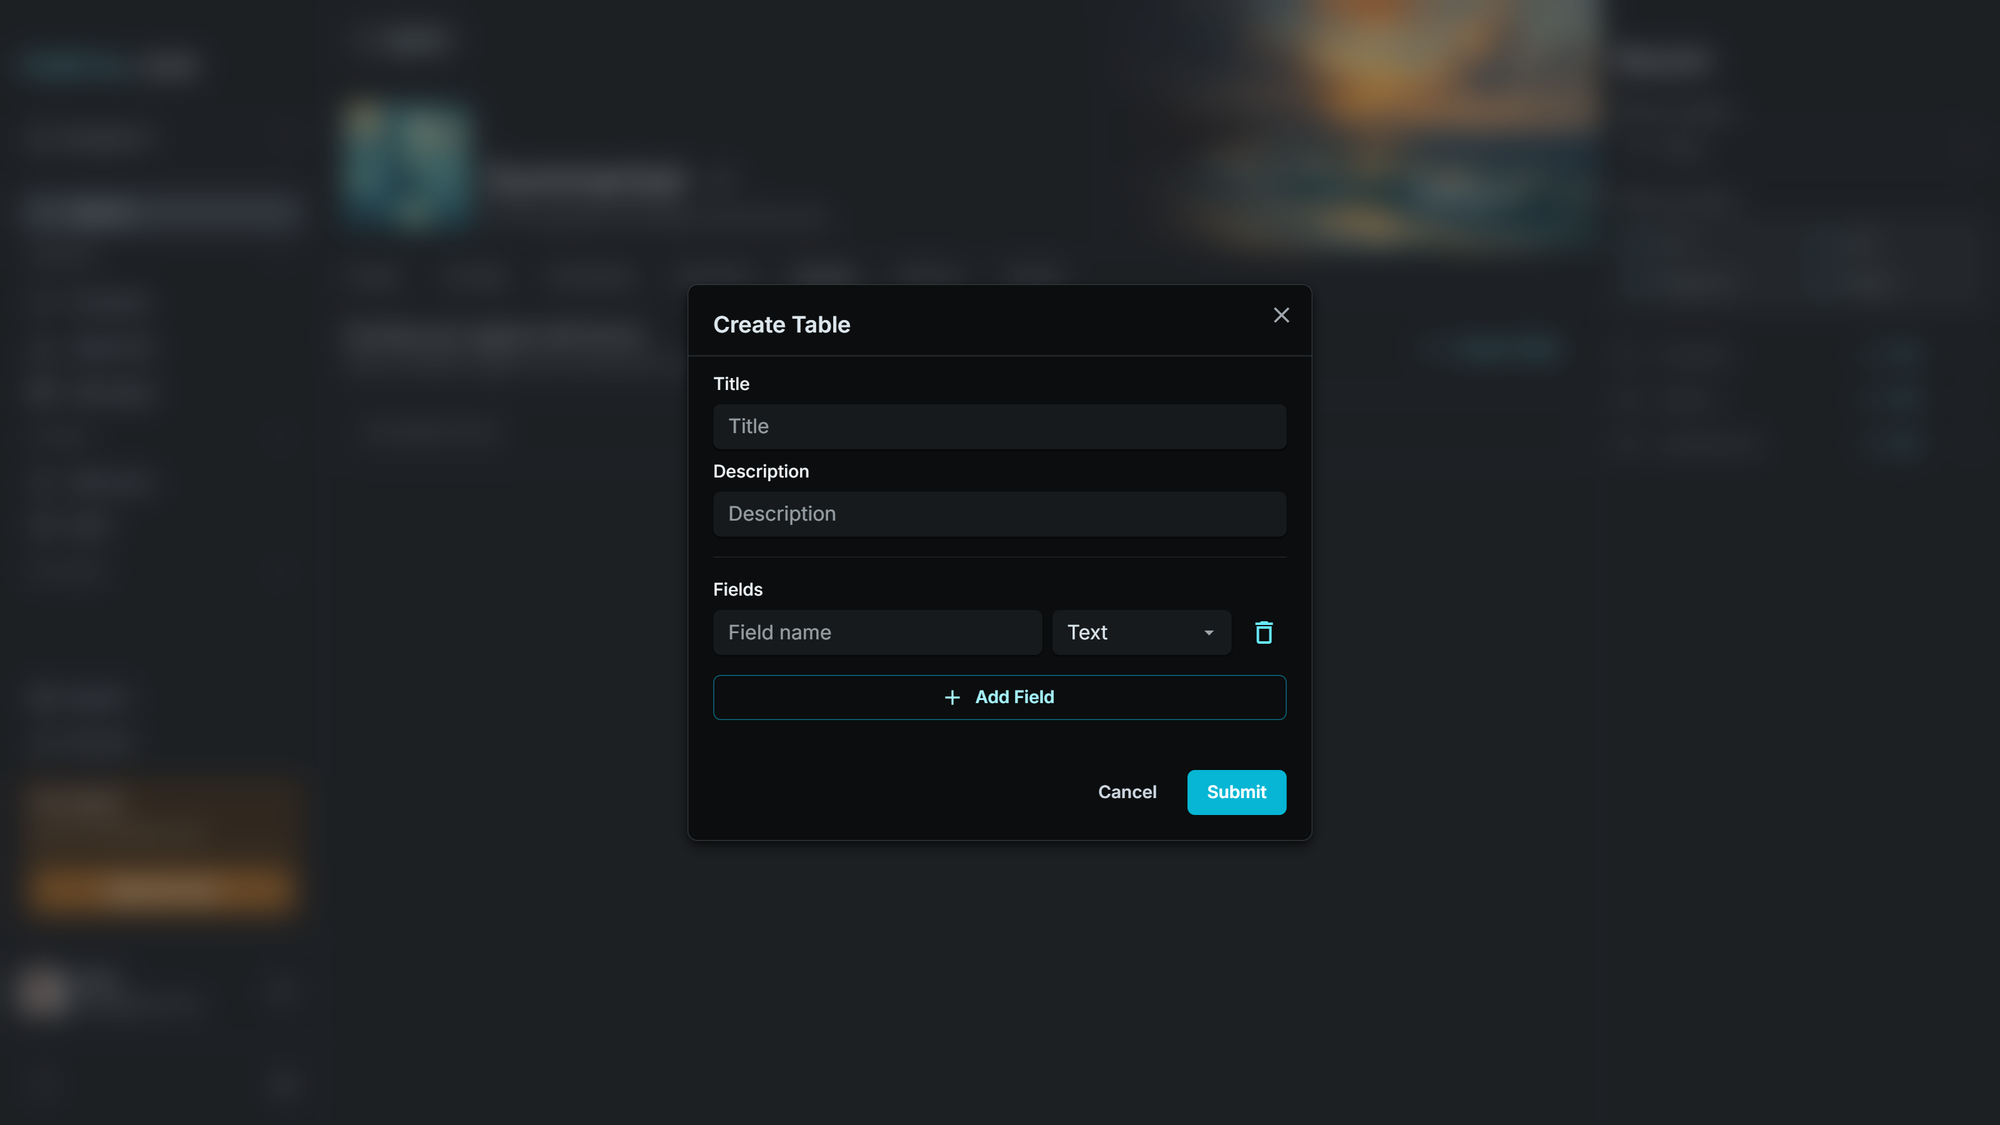
Step 3 - Submit: Once configured, click "Submit." Your new Table will appear as a "card" on the Forms tab. Don't worry about getting the structure perfect immediately; you can always revise your Table later by adding or deleting fields as your needs evolve.
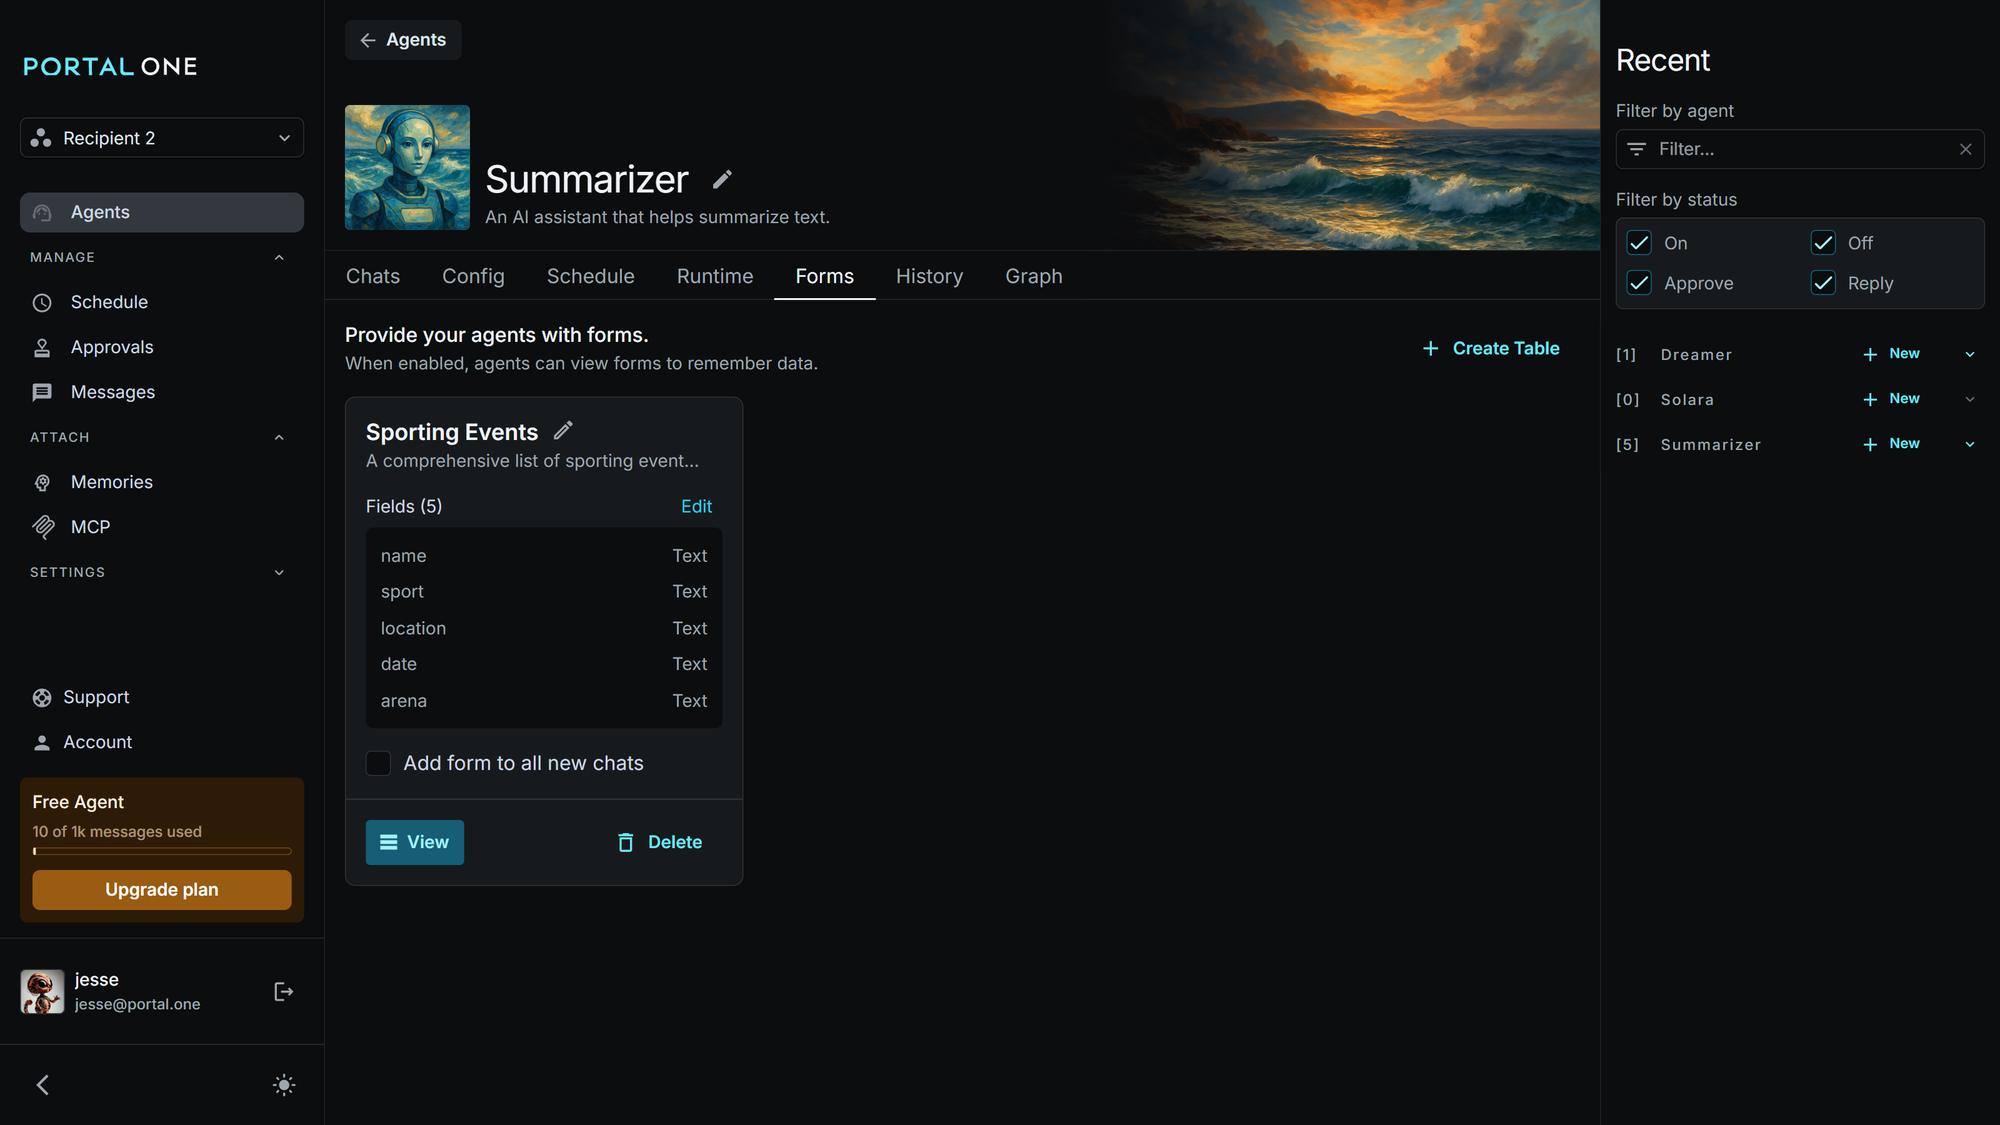
Table Card Options:
- Edit: Modify the Table's Title, Description, or schema (fields and types).
- Note: If a field (column) is deleted, data in that column for all existing Forms (rows) will be lost. If a field is added, existing Forms will have an empty value for that new field.
- Add form to all new chats: If checked, a new, blank Form (row) based on this Table's schema will be automatically attached to every new conversation initiated with this agent. This provides the agent with an immediate structure to work with, though explicit instructions are needed to guide its completion.
- View: Opens the Table View, displaying all Forms (rows) within the Table.
- Delete: Permanently removes the Table and all its Forms.
Working with Forms (Rows) in the Table View
Clicking "View" on a Table card takes you to the Table View, where each Form (row) is listed.
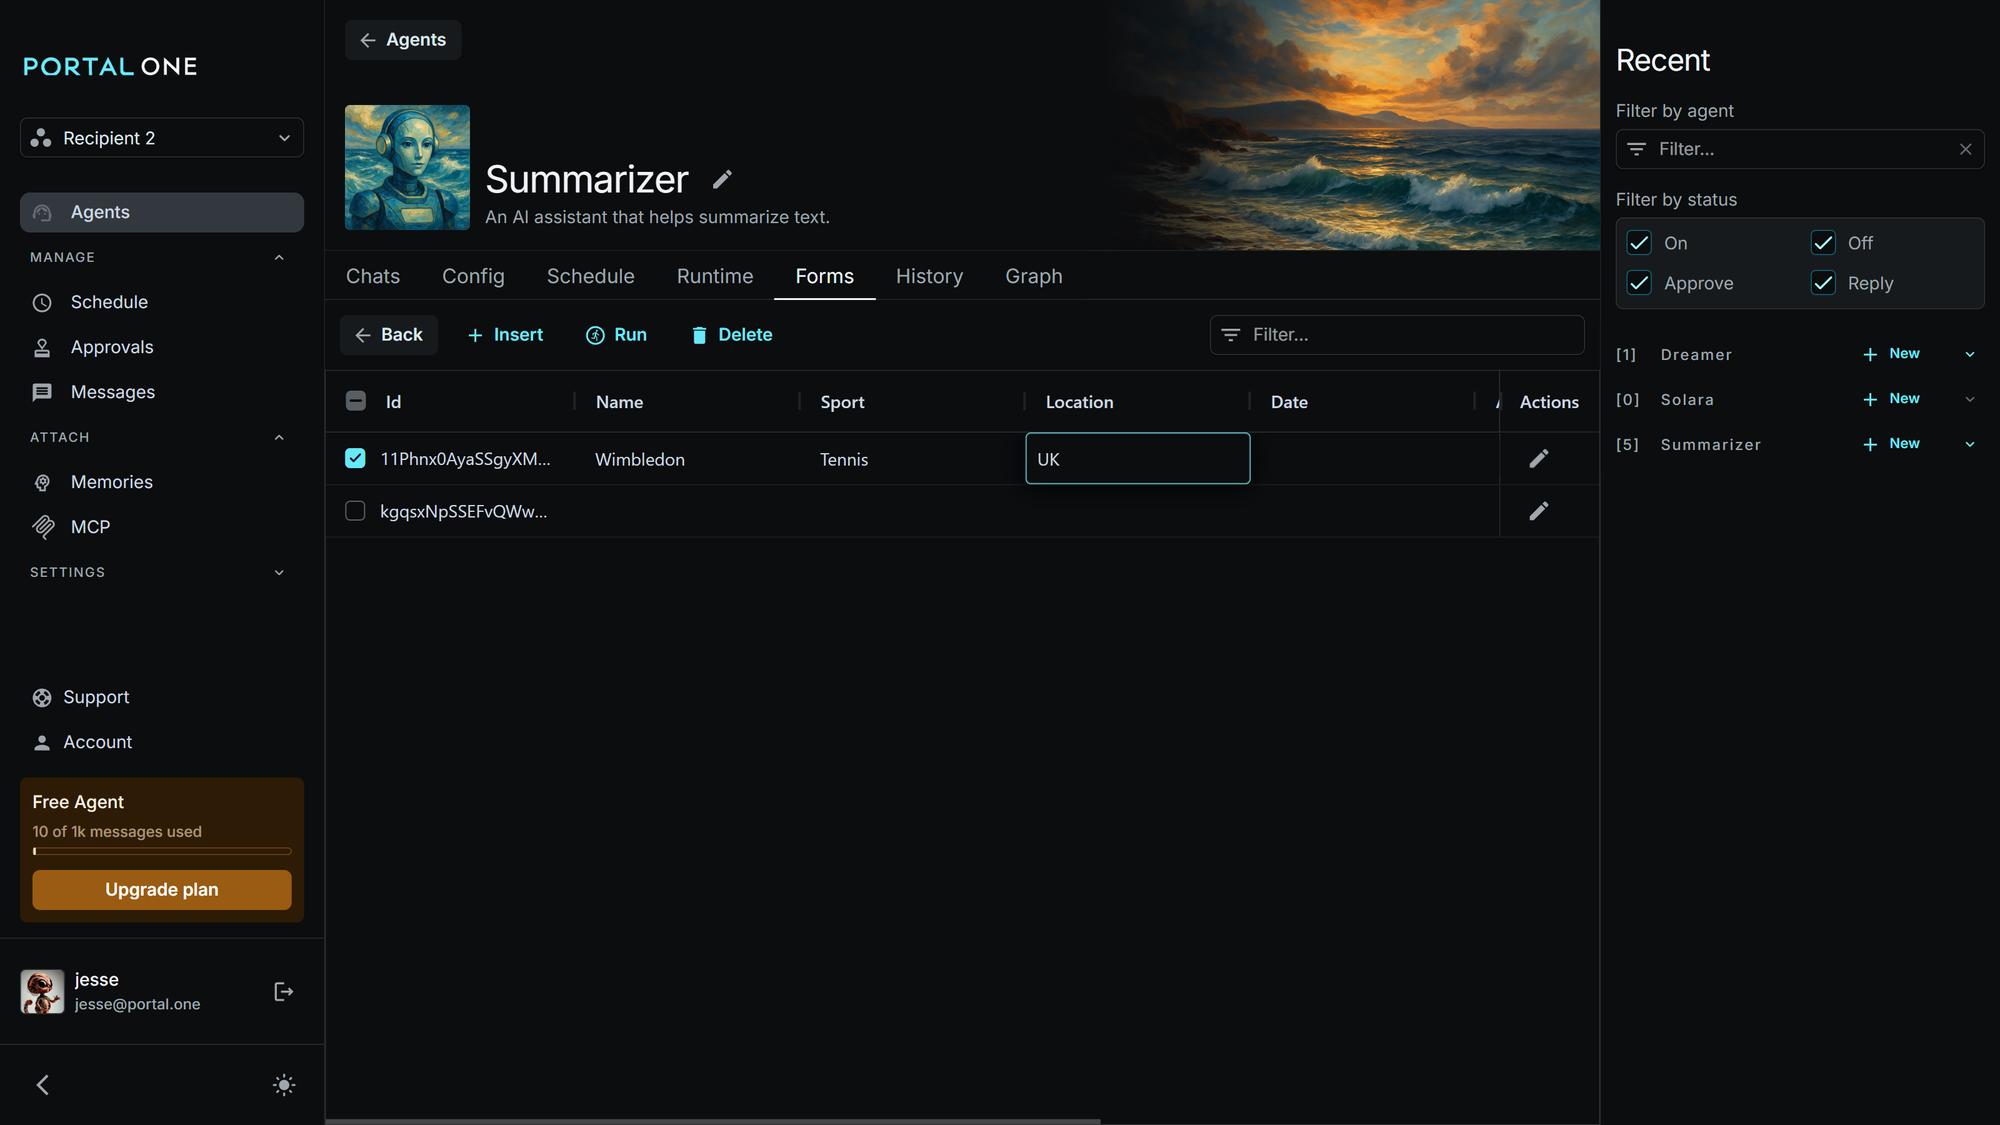
Table View Options:
- Back: Returns to the Forms tab (Table cards view).
- Insert: Creates a new, blank Form (row) in the Table, adhering to the Table's predefined schema.
- Run: Select one or more Forms (rows). Clicking "Run" will attach each selected Form to a new, separate conversation with the agent, allowing for concurrent processing. This is powerful for batch operations, like generating multiple SEO articles if each Form contains initial details for an event. Instructions for processing can be provided via a Memory attached to the agent.
- Delete: Deletes the selected Forms (rows).
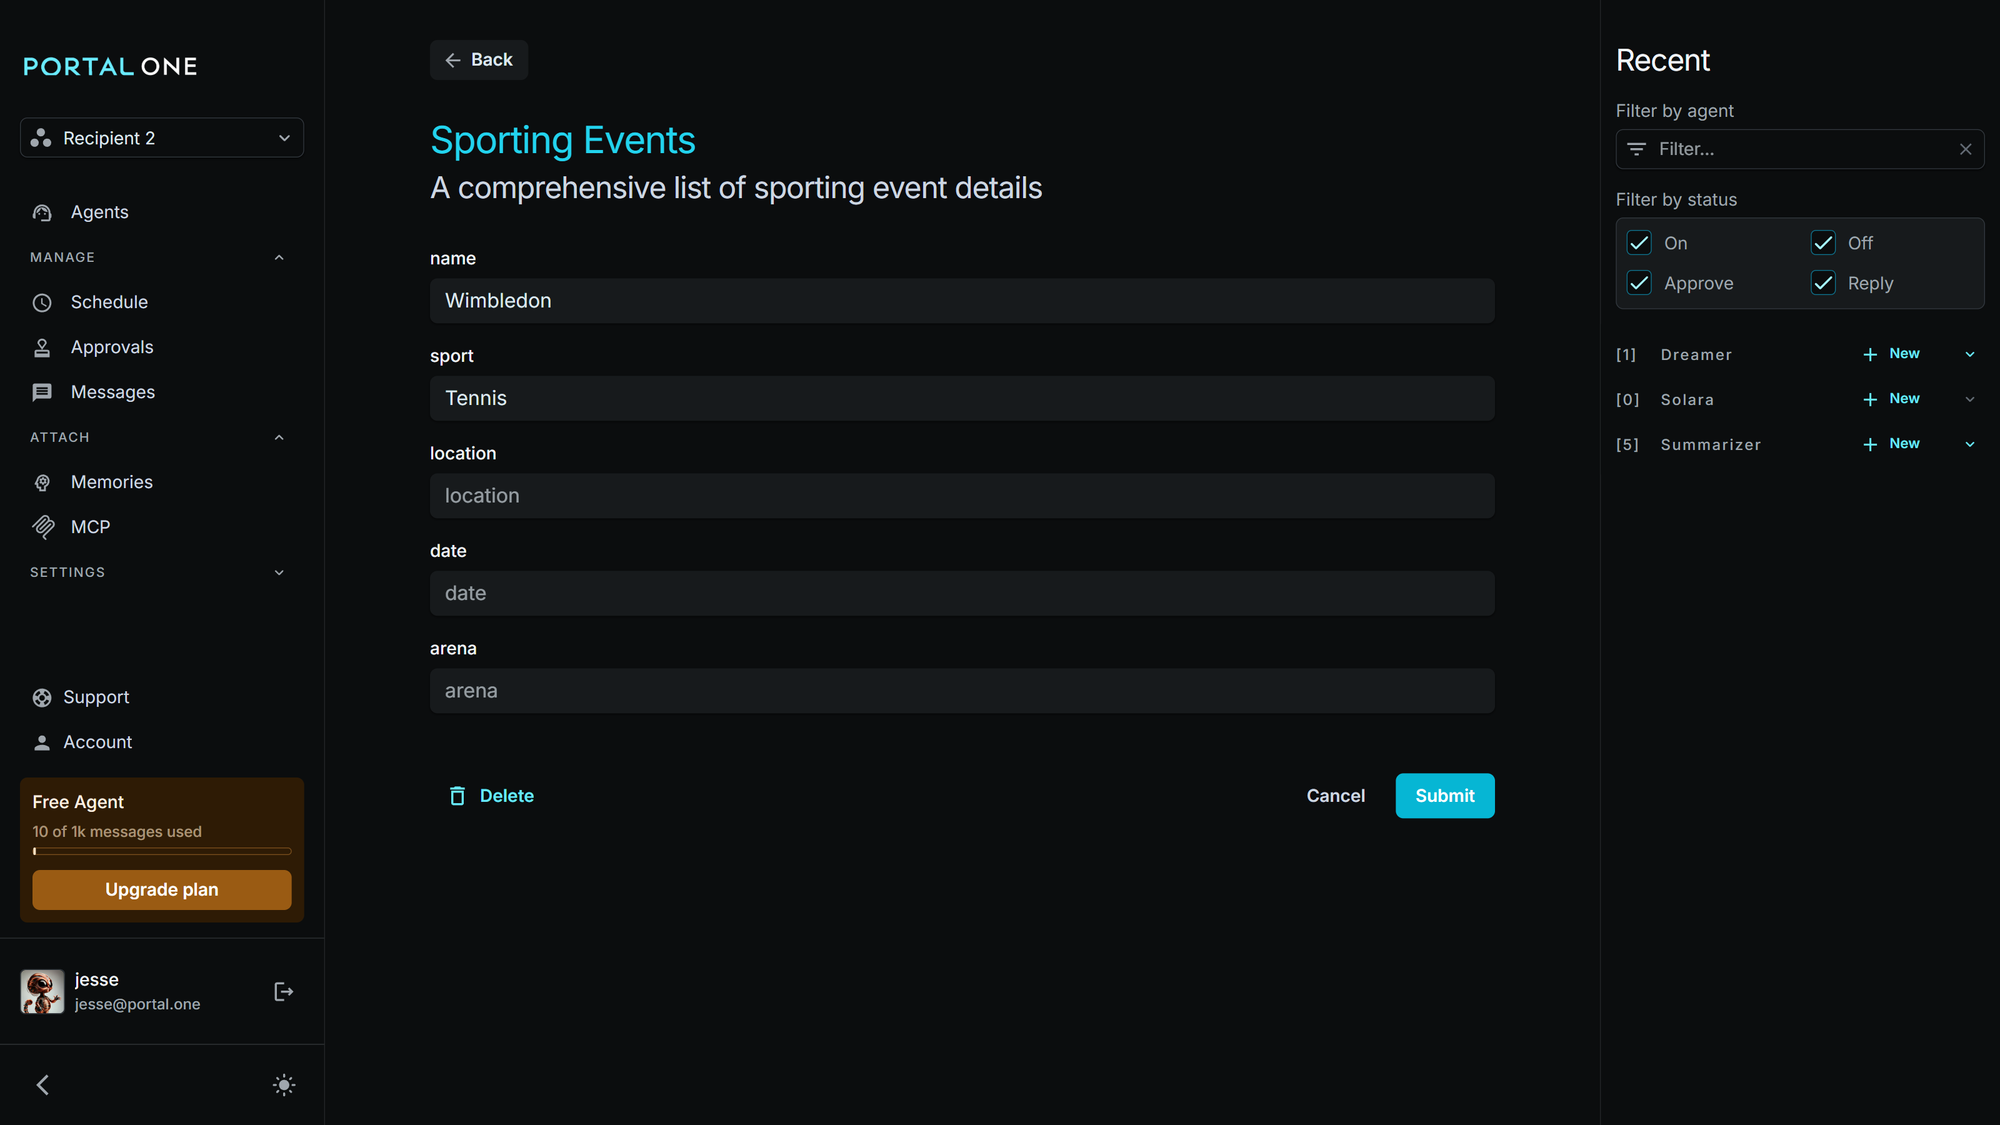
- Edit (per row): Opens the "Form Details Page" for that specific Form, allowing users to manually view or edit its field values.
How AI Agents Interact with Tables and Forms
Agents can interact with Tables and Forms in several ways:
- Reading Data (System Prompt Injection):
- Entire Tables: You can attach a full Table to an agent via its "Config" tab (under the "Tables" card). The entire Table's content will be injected into the agent's system prompt before each message generation, providing it with context.
- Individual Forms: Similarly, individual Forms (rows) can be attached. If "Add form to all new chats" is enabled, or if a Form is attached via the "Run" command, that Form's data is injected into the system prompt.
- Modifying Data (Using Agent Tools):
- To enable agents to create, update, or delete Tables and Forms, they must be equipped with the appropriate tools from the Portal One MCP Server. Ensure your Portal One MCP server is configured for the agent.
- Available tools include:
list_tables,get_table,put_table,delete_table,list_forms,get_form,put_formm,delete_form,attach_resource,detach_resource. - Example - Agent Filling a Form: Imagine a Table "Sporting Events" with fields like 'Name', 'Date', 'Location', 'Sport', 'Twitter Accounts to Follow'.
- A blank "Sporting Event" Form is attached to a new chat.
- The user provides an instruction, for example, via an agent Memory or a direct message: "Using the provided blank form, please research and fill out all missing fields, then draft a high-quality SEO article based on the completed data."
- The agent, using research tools (like Google Search if provided) and the
put_formtool, iteratively finds the information (date, location, etc.) and updates the respective fields in the Form attached to the conversation. - Once all fields are filled, the agent can then proceed with its subsequent task, like drafting the SEO article.
- Agents need the Table Name/ID and Form ID to use modification tools. This information is available in the system prompt if a Form is attached, or agents can use tools like
list_tablesto discover them.
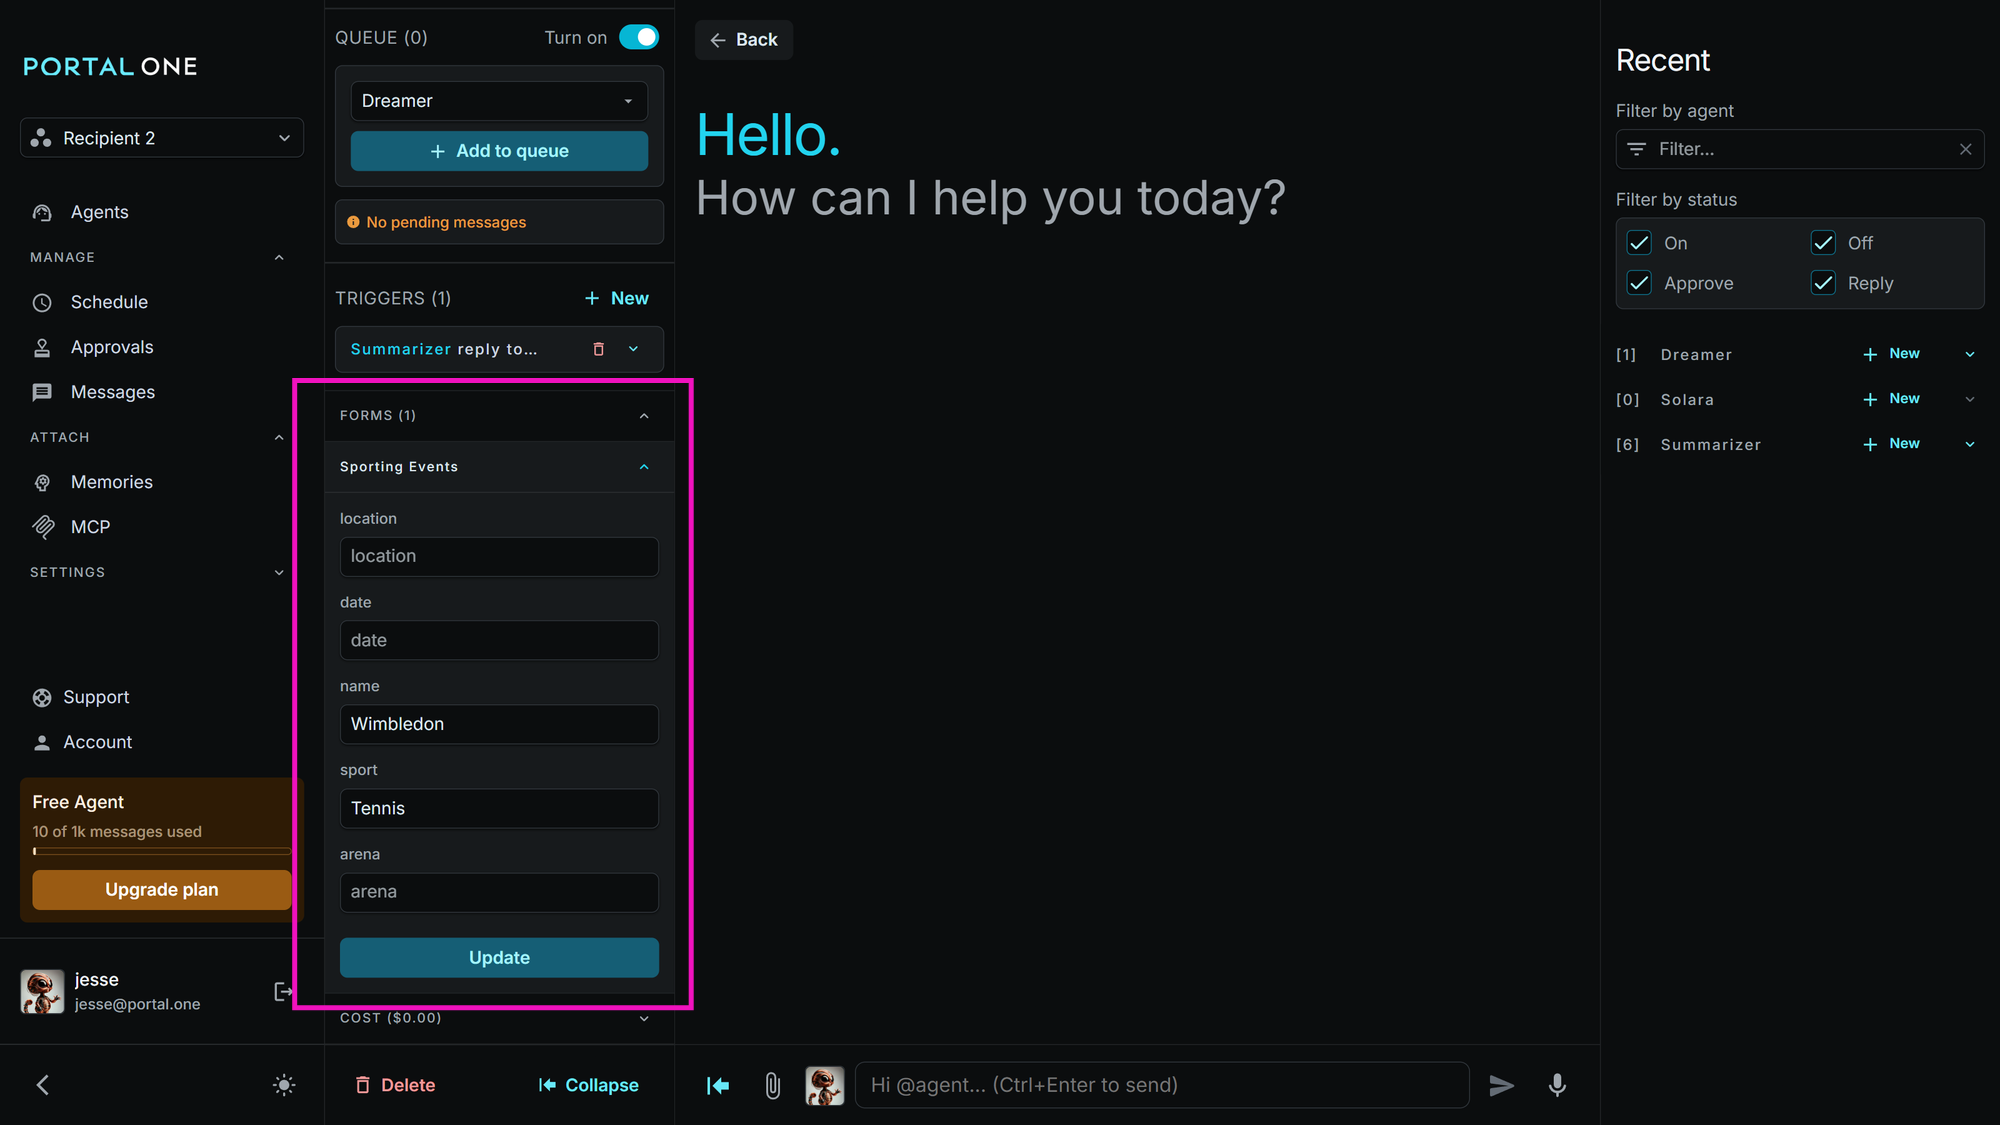
- User Edits in Conversation:
- If a Form is attached to a conversation, users can also view and edit its fields directly within the conversation view under the "Forms" accordion item.
Use Cases
- State Management: Track progress or store information across multiple interactions.
- Checklists/Instruction Sets (Case Study Example): Guide an agent through a multi-step process. For instance, a marketing team uses a "New Campaign Checklist" Table. Each row (Form) represents a new campaign with fields like 'Campaign Name', 'Target Audience', 'Key Message', 'Asset Creation Status', 'Launch Date'. An agent is tasked with populating asset creation status by checking internal systems and then notifying the team lead once all assets are ready, all driven by the Form.
- Data Collection & Storage: Agents can populate Tables with data extracted from documents, user interactions, or external sources.
- Batch Processing: Use the "Run" feature to apply an agent's skills to many Forms (rows) concurrently (e.g., enriching multiple data center entries, generating reports for a list of items).
Best Practices
- Clear Naming: Use descriptive and unique names for your Tables and their fields.
- Start Simple: Begin with a few fields and test thoroughly before adding complexity.
- Explicit Instructions: Remember that attaching a Form to an agent makes the data available. You still need to provide clear instructions (in the agent's setup or in the chat) on how the agent should use or complete the Form.
- MCP Server for Edits: Ensure the Portal One MCP Server is configured if you want agents to modify Table or Form data.
- LLM Context Size: Keep in mind the varying context limits and abilities when deciding which LLM to use. Attaching very large tables can confuse or overwhelm some LLMs, making them perform poorly.
By mastering Tables and Forms, you can significantly enhance your AI agents' ability to manage information, follow complex instructions, and interact with data in a structured and efficient manner.