Signing Up & Your First Login
New to Portal One? Learn how to easily create your account, complete your first login, and set up your essential workspace to start managing AI agents.
Welcome to Portal One! Follow these steps to quickly create your account, log in, and set up your first workspace.
Step 1: Navigate to Portal One & Enter Email
- Open your web browser and go to: https://ai.portal.one
- You'll see a form asking for your email address. Enter your email and click Continue.
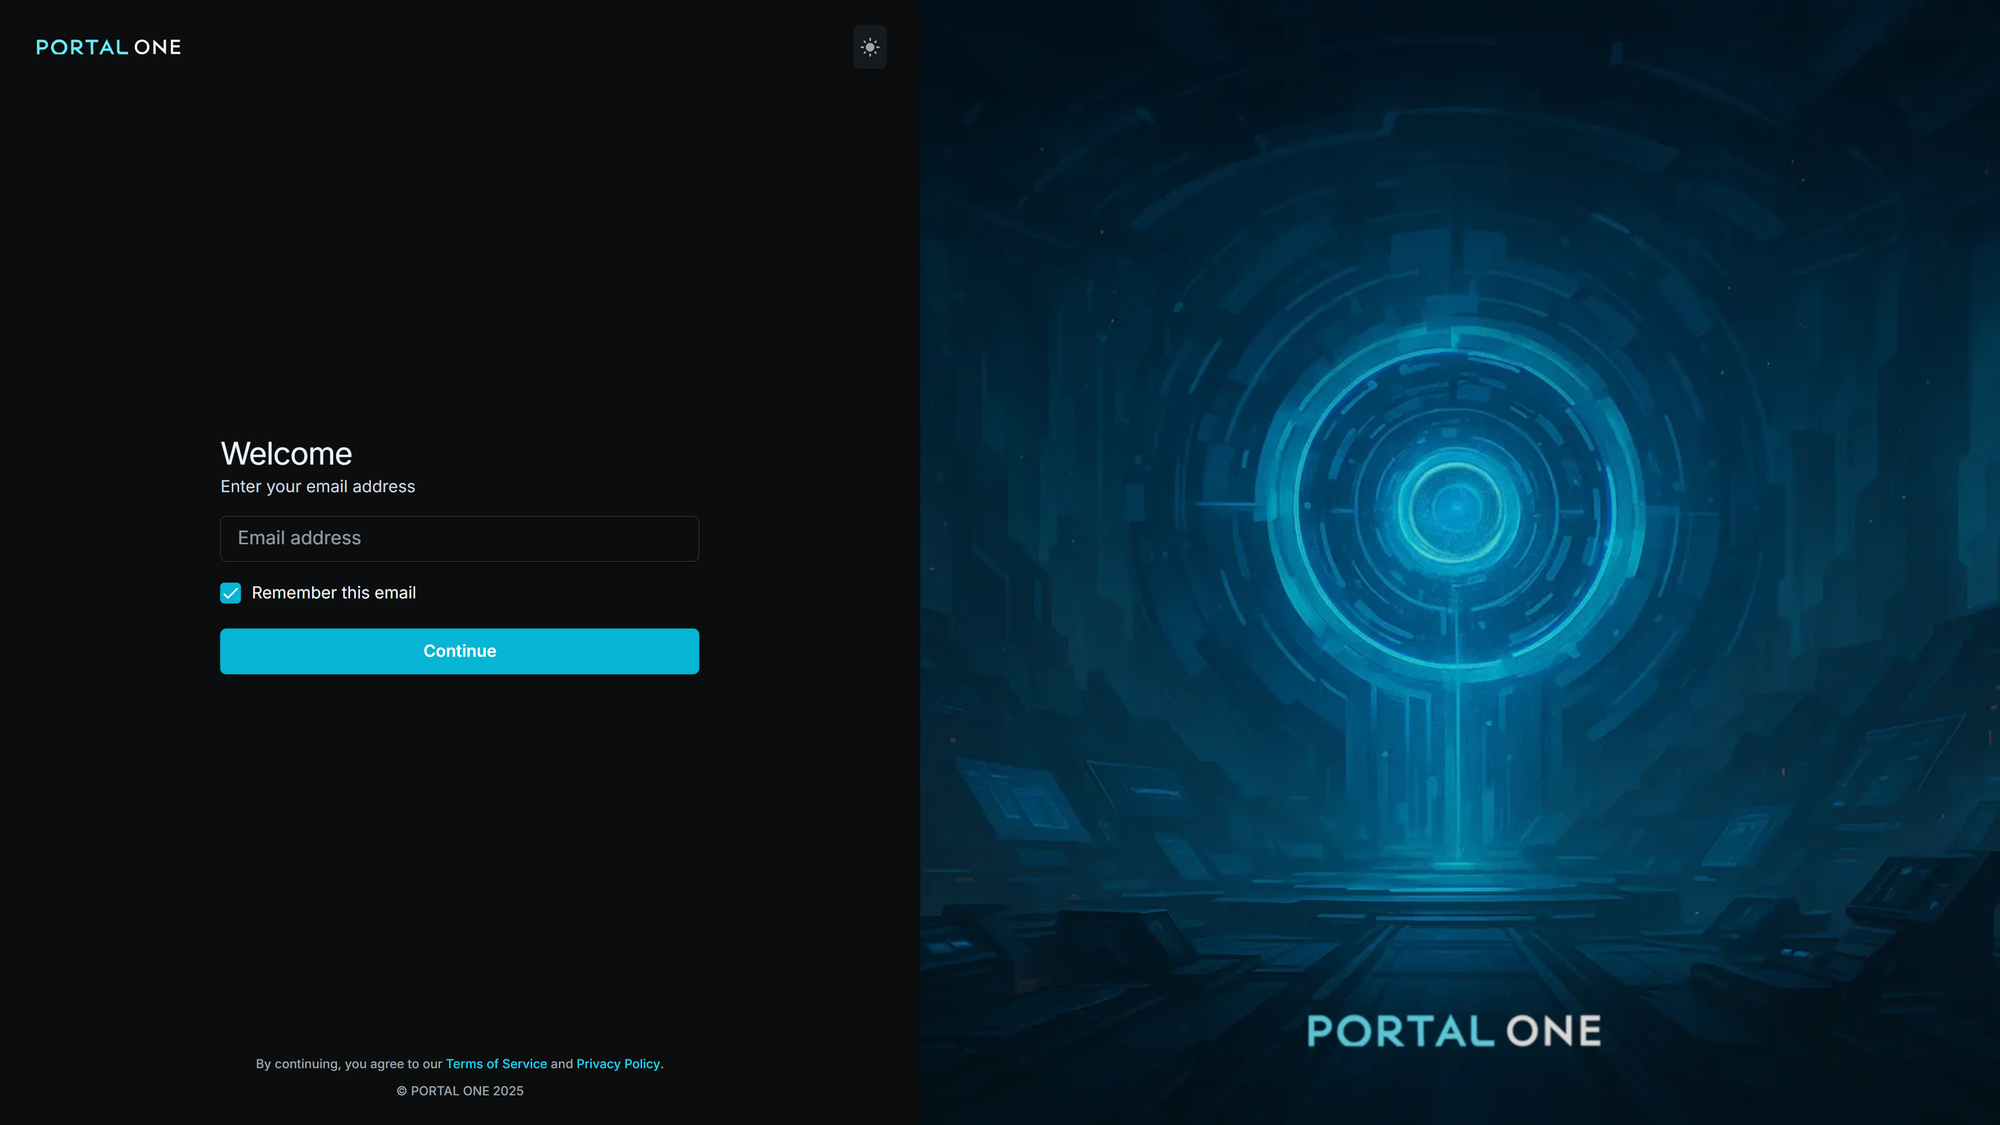
Portal One will now check if an account exists with this email.
Step 2: Create Your Account (If You're New)
If no account is associated with your email, you'll be prompted to create one. You have two options:
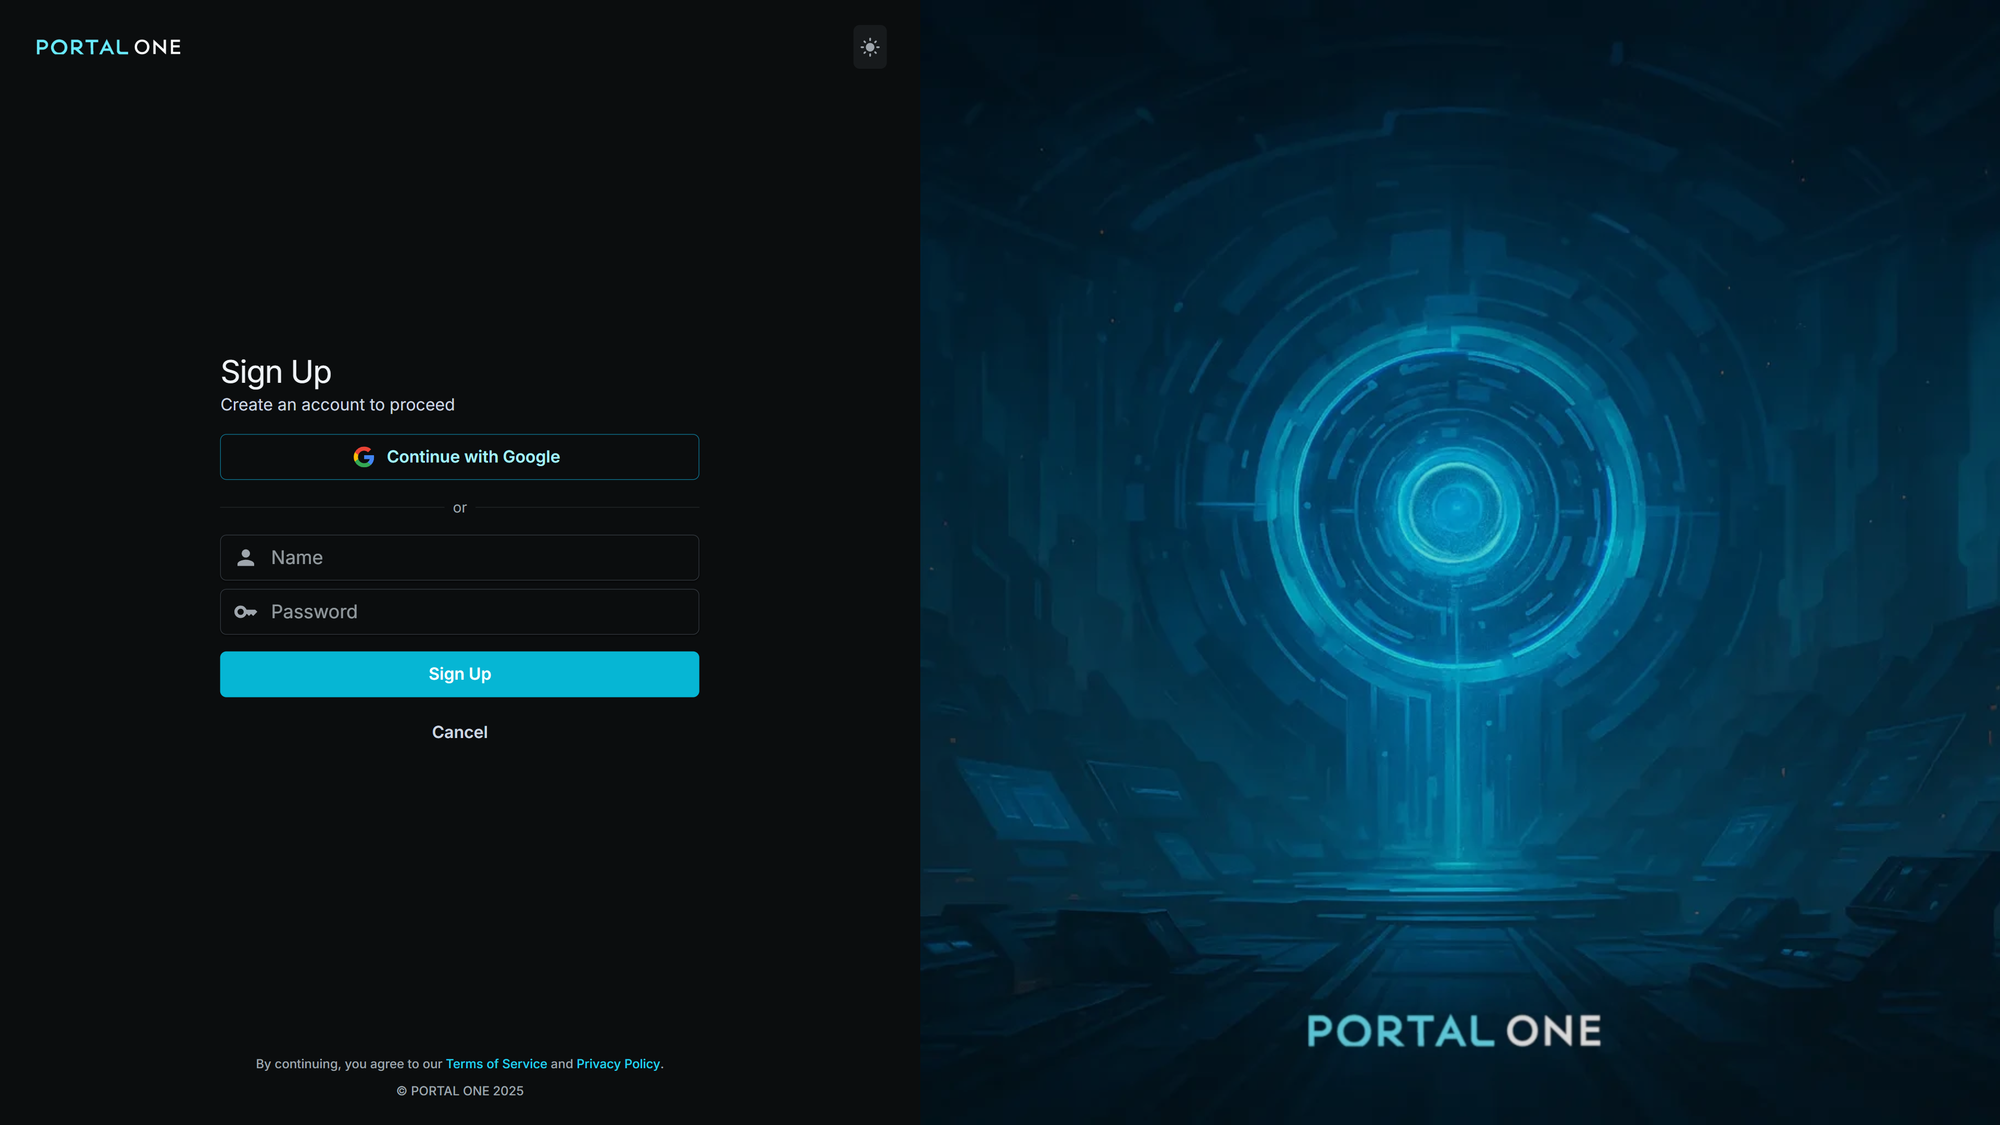
A. Sign Up with Google:
- Click the Continue with Google button.
- You'll be redirected to Google's standard authentication flow. Sign in with your Google account and grant any necessary permissions.
- After successful Google authentication, you will be automatically redirected to your Portal One Account Page. Proceed to Step 4: Creating Your First Workspace.
B. Sign Up with Email and Password:
- If you choose not to use Google, fill in the Name and Password fields.
- Choose a strong, unique password.
- Click Sign Up.
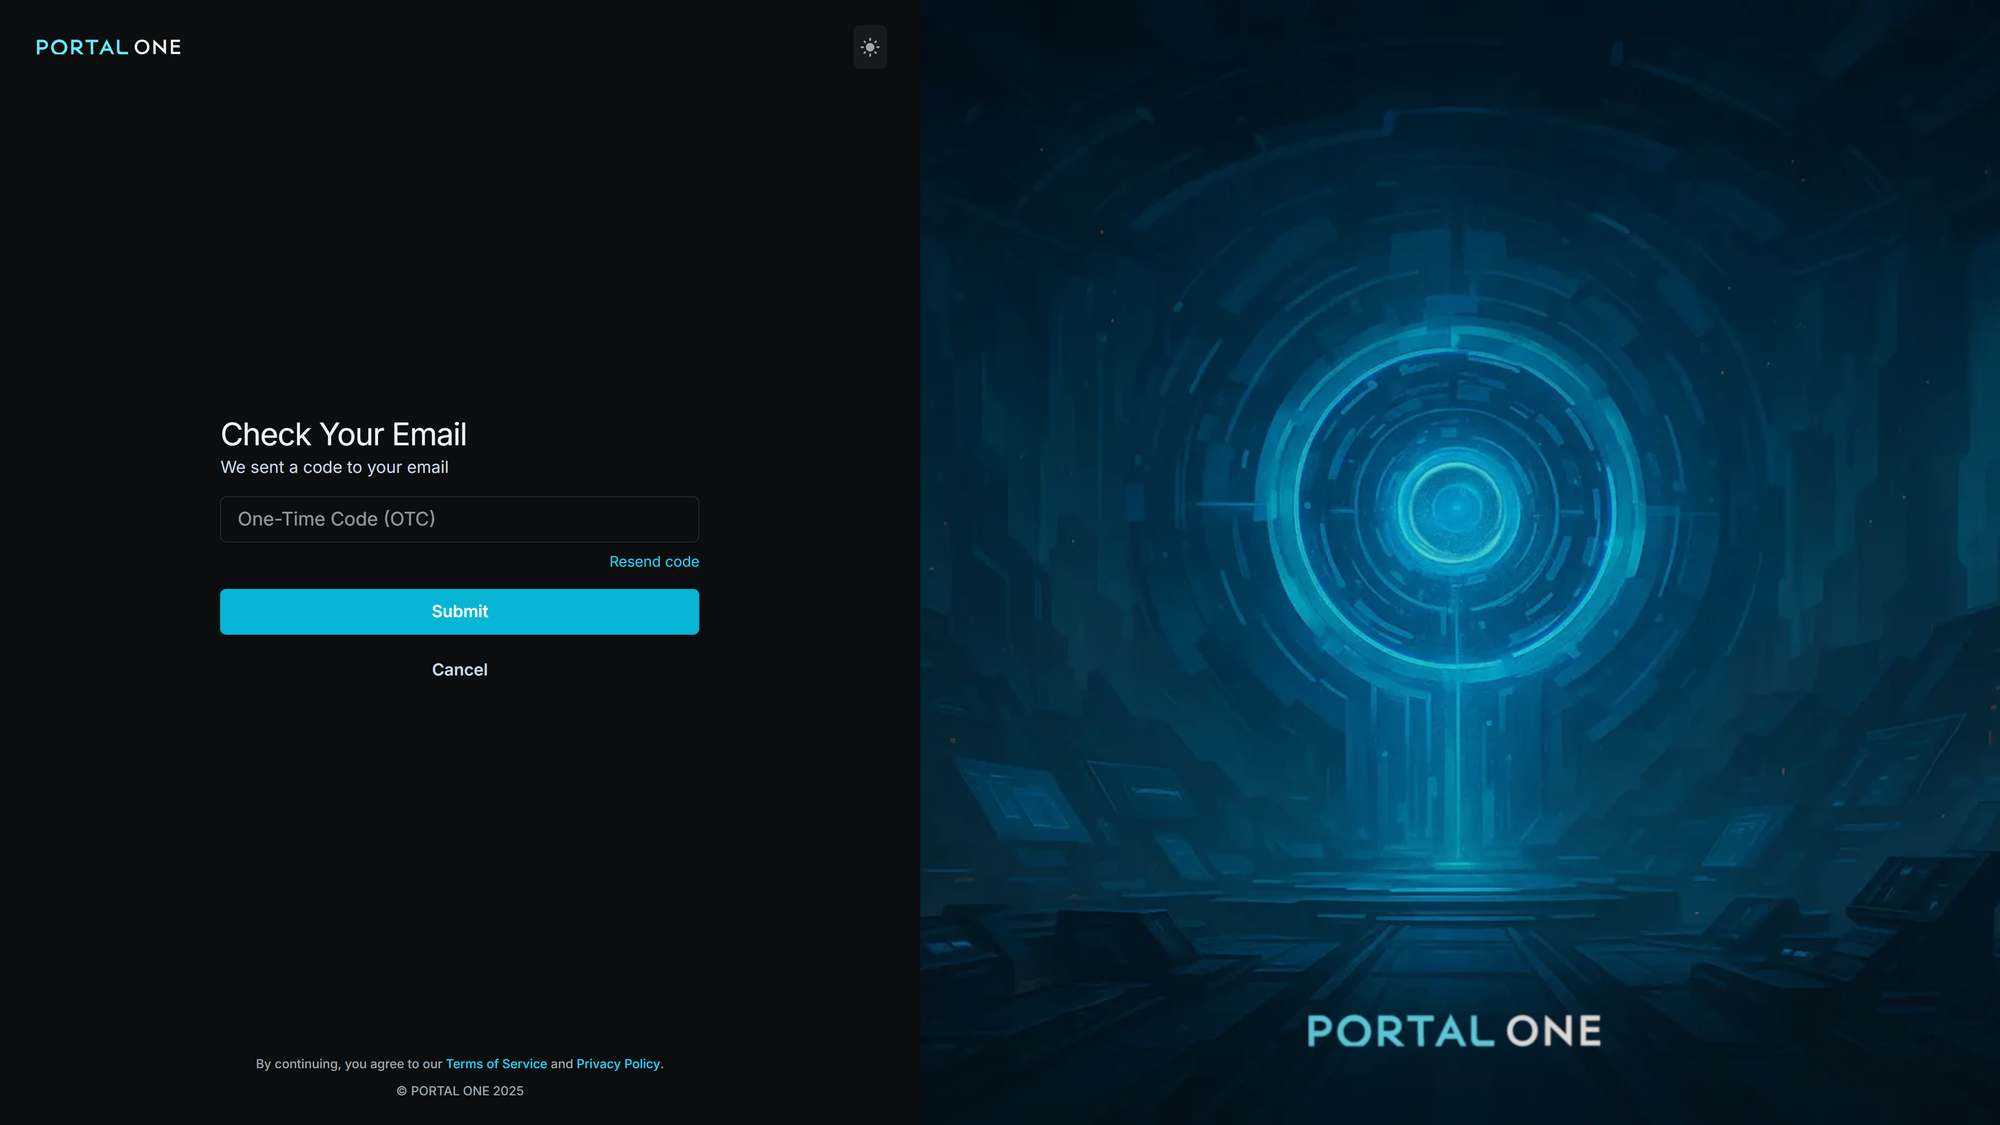
- You will then be instructed to check your email for a One-Time Code (OTC) to verify your email address.
- Open your email inbox, find the email from Portal One, and copy the OTC.
- Return to the Portal One sign-up page and enter the OTC in the designated field.
- Once the correct OTC is entered, your account will be created, and you will be redirected to your Portal One Account Page. Proceed to Step 4: Creating Your First Workspace.
Step 3: Logging In (If You Have an Existing Account)
If an account already exists for the email you entered, you'll be prompted to log in:
A. Log In with Google:
- If your account was originally created using Google, click the Log in with Google button.
- Follow Google's standard authentication flow.
- Upon success, you'll be logged in. If you haven't created a workspace yet, you'll be directed to the Account Page (see Step 4). Otherwise, you'll land on your default workspace dashboard.
B. Log In with Password:
- If your account uses a local password, you'll be prompted to enter your Password.
- Enter your password and click Log In.
- Upon success, you'll be logged in. If you haven't created a workspace yet, you'll be directed to the Account Page (see Step 4). Otherwise, you'll land on your default workspace dashboard.
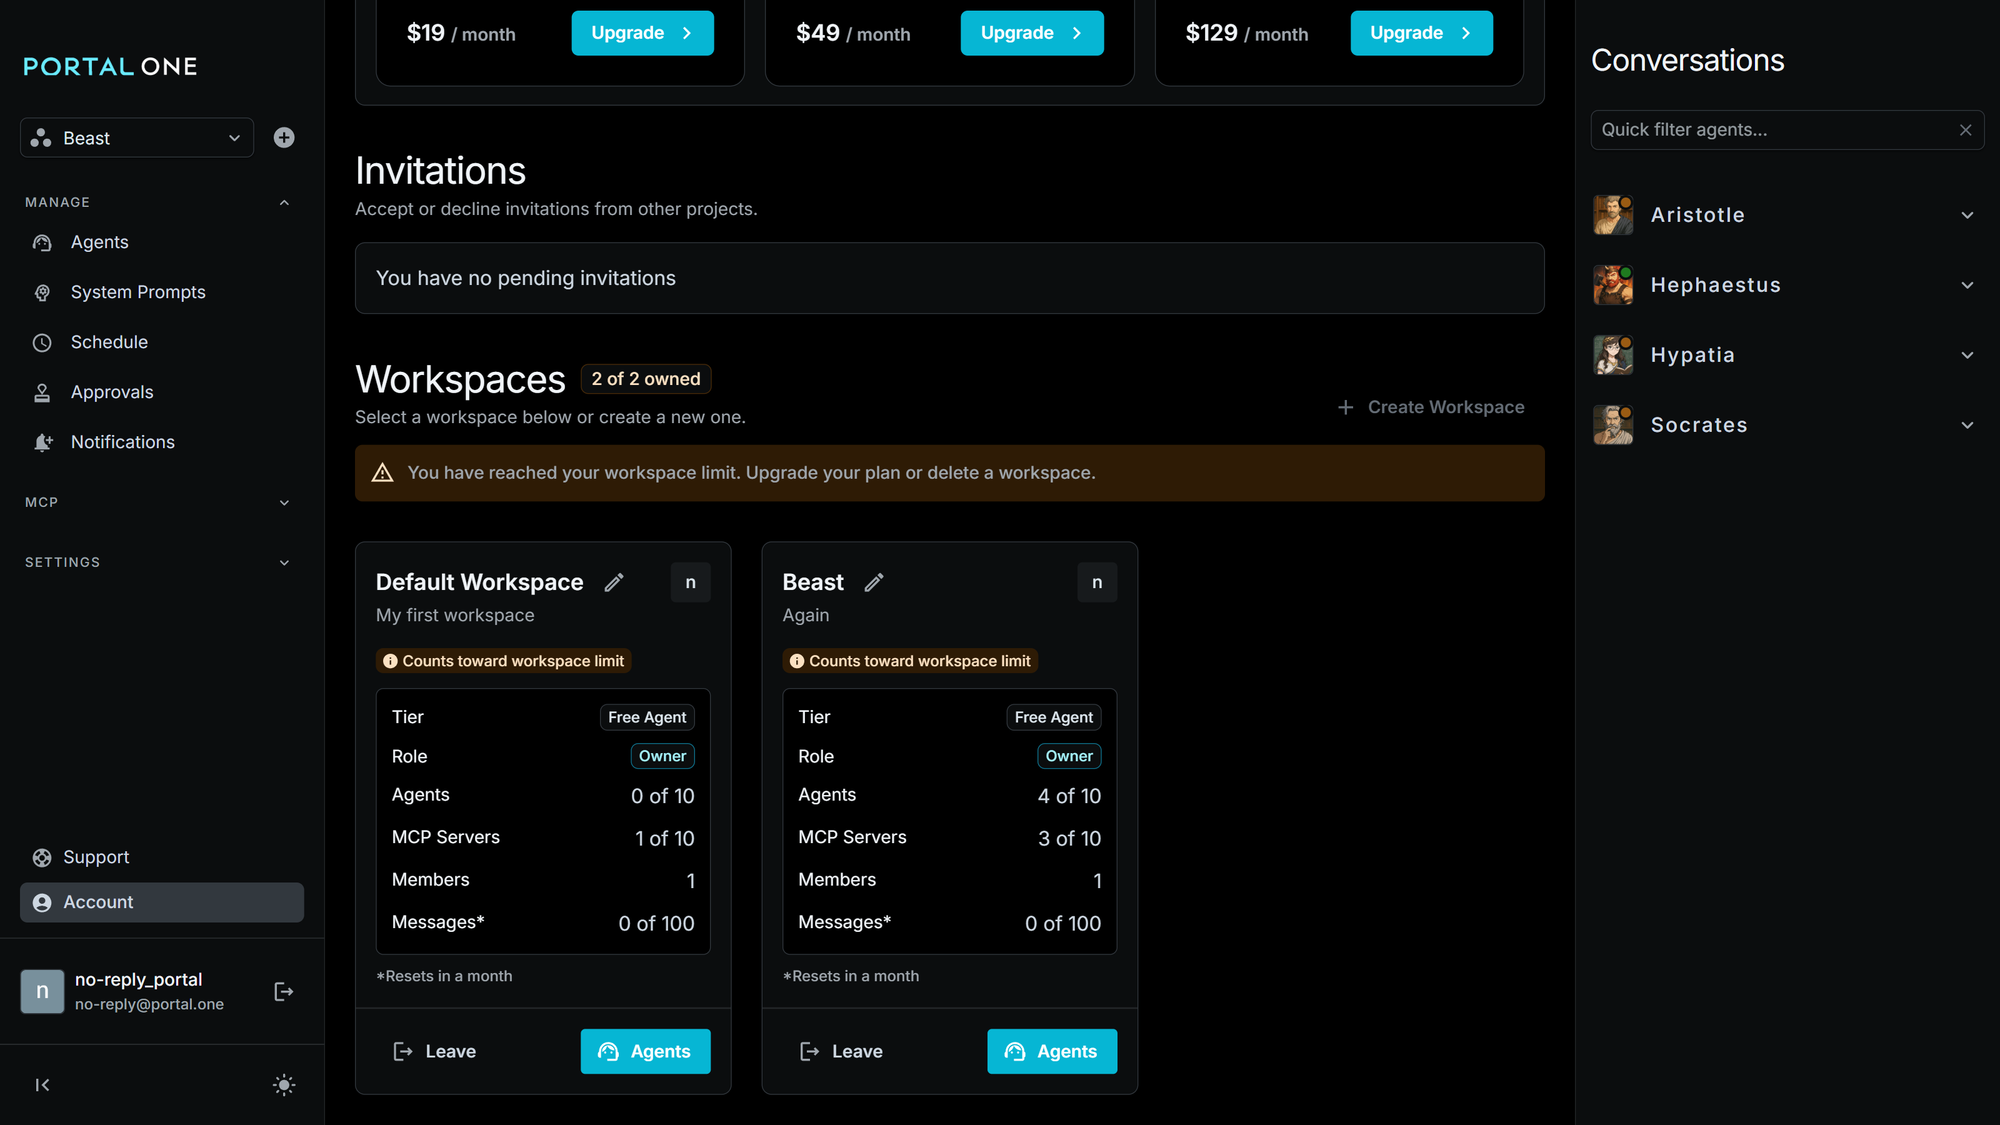
Step 4: Welcome to Your Workspace!
Once you login you will be in your default workspace:
- The main application navigation menu will appear on the left.
- You will have full access to all Portal One features within that workspace.
You are now ready to start exploring Portal One!
Troubleshooting Tips
Not receiving the One-Time Code (OTC)?
- Check your spam/junk email folder.
- Ensure you entered your email address correctly.
- Click the "Resend Code" button.
- Check our our Support Page
Forgot your password?
- Look for the "Forgot Password?" link on the login screen for local accounts.
- If you signed up with Google, manage your password through your Google account.